Online booking · Setup guide
Set up your online booking page
Give clients the right services, ask useful questions, and offer the hours you actually work. Follow these ten steps from your first settings to a test booking.
Step 01
Open your booking settings
Open the booking page settings for the calendar you want clients to book. Check your business name, timezone, and normal weekly availability before adding advanced options.
Step 02
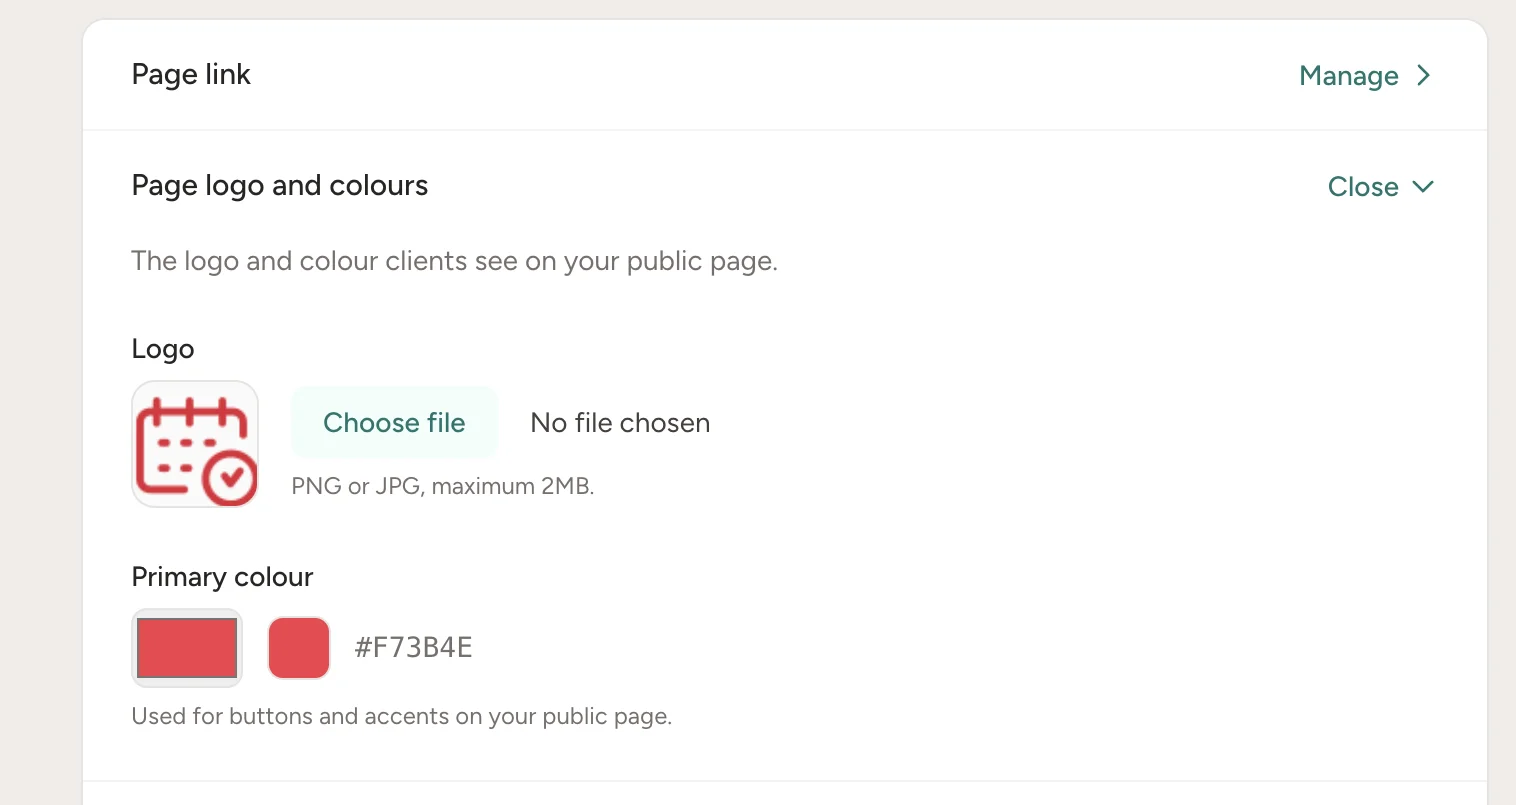
Add your logo and colour
In Branding, upload the logo clients will see and choose the primary colour for buttons and highlighted elements. Check that your logo remains readable on a phone.
Step 03
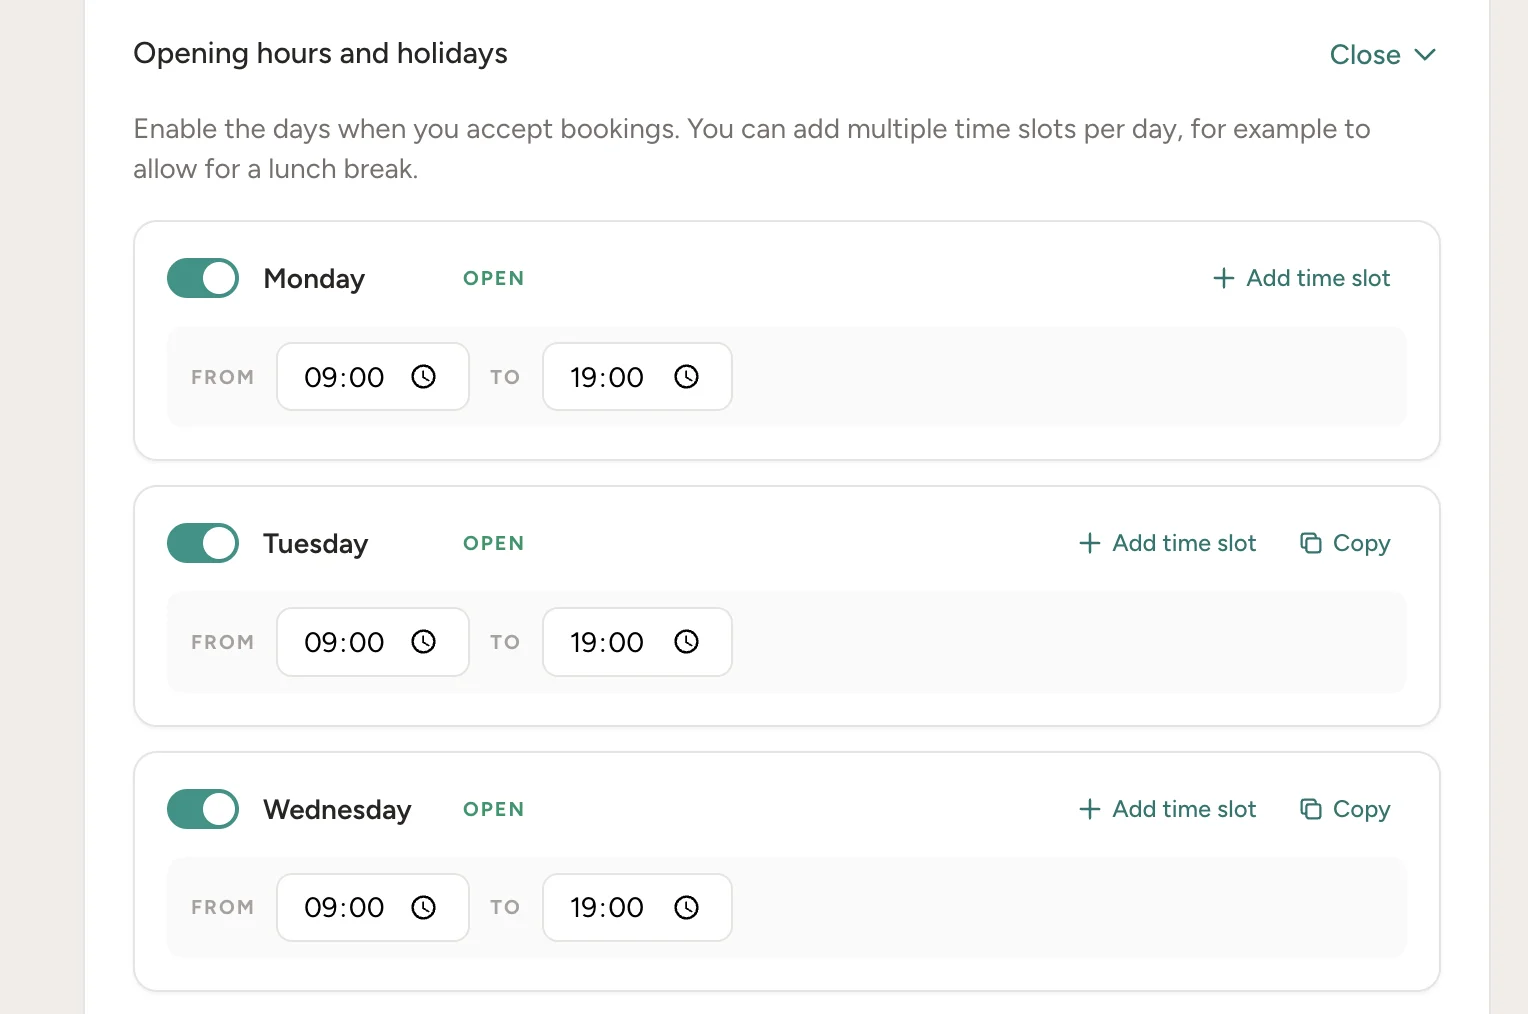
Set weekly hours and closures
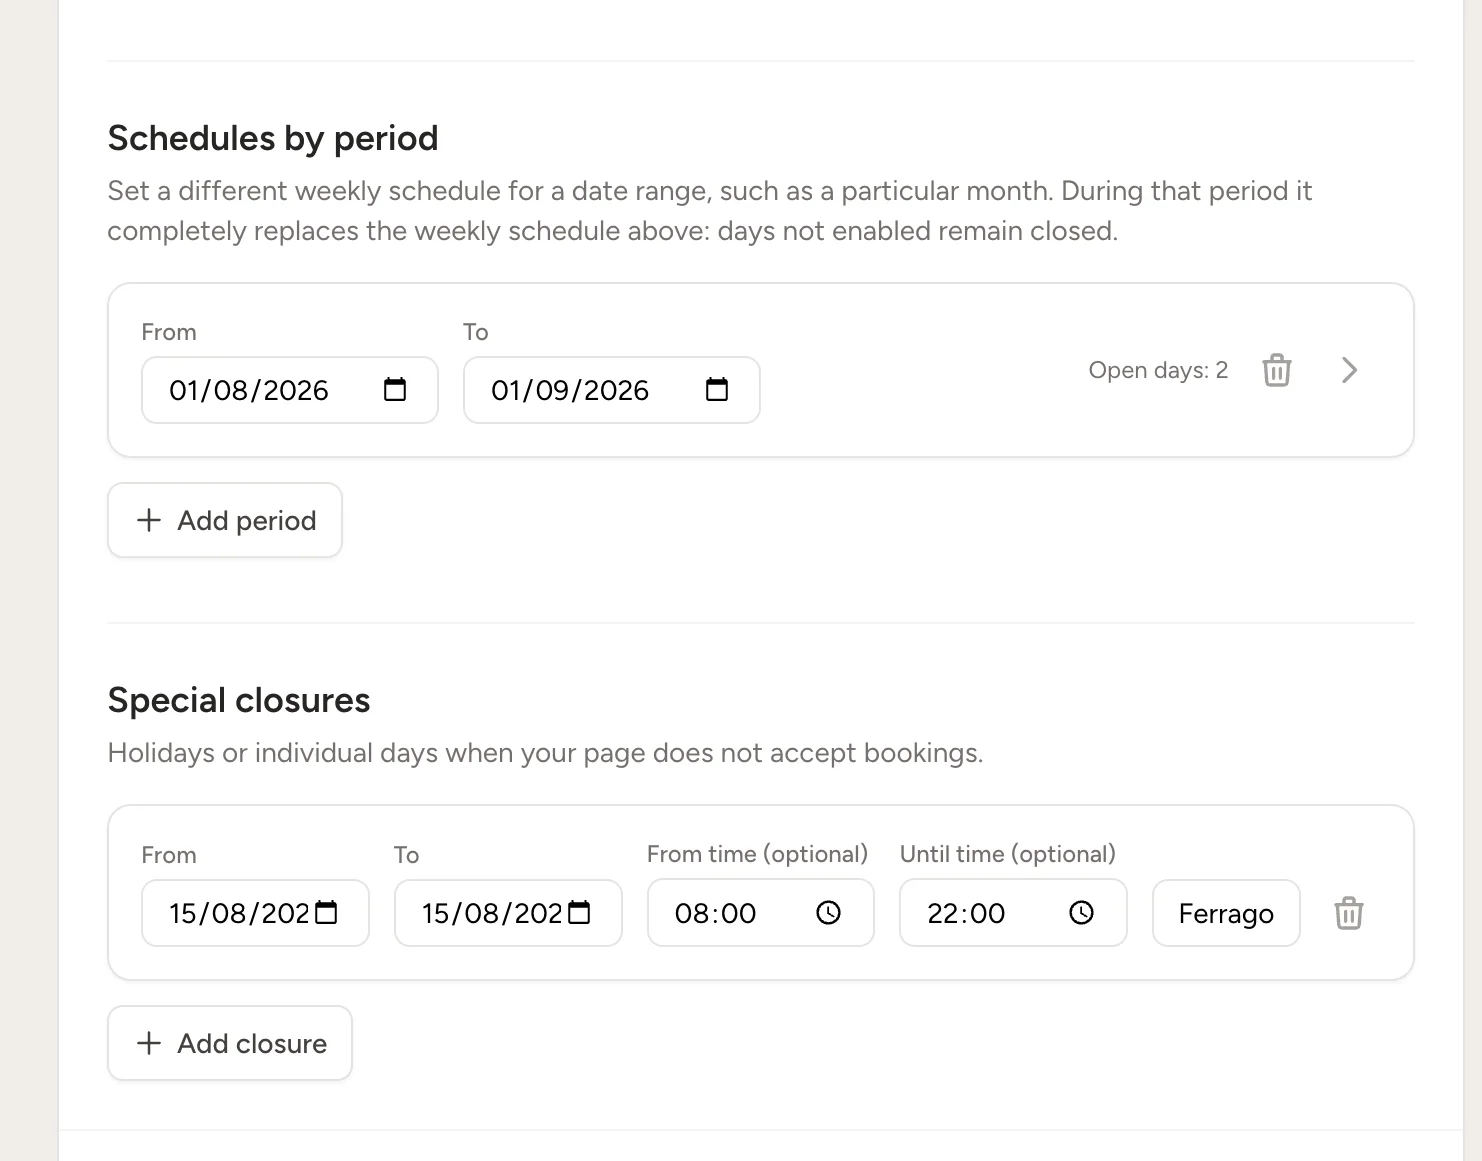
Enable the days you accept appointments and add a start and end time. Use separate time ranges for morning and afternoon so lunch is not bookable. Add date-based closures for holidays.
Step 04
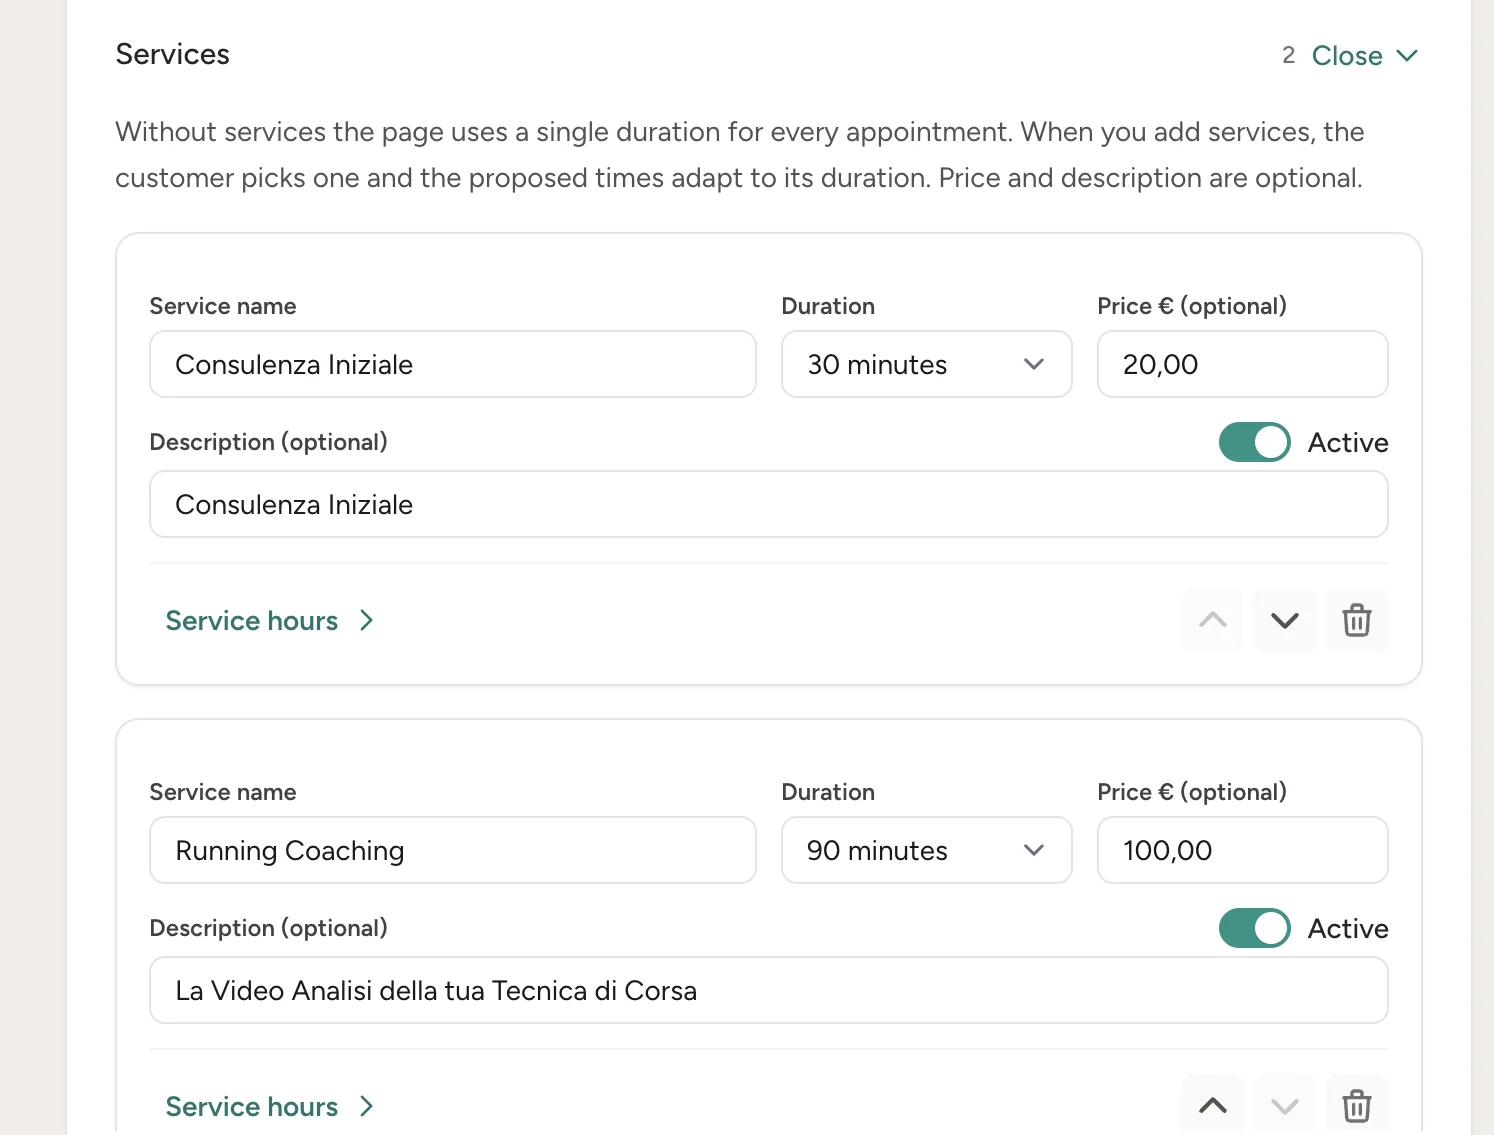
Create your services
Add a service with a recognisable name and duration. You can also show a price and description. Disable a service temporarily when it should not be bookable, or change its position in the list.
Step 05
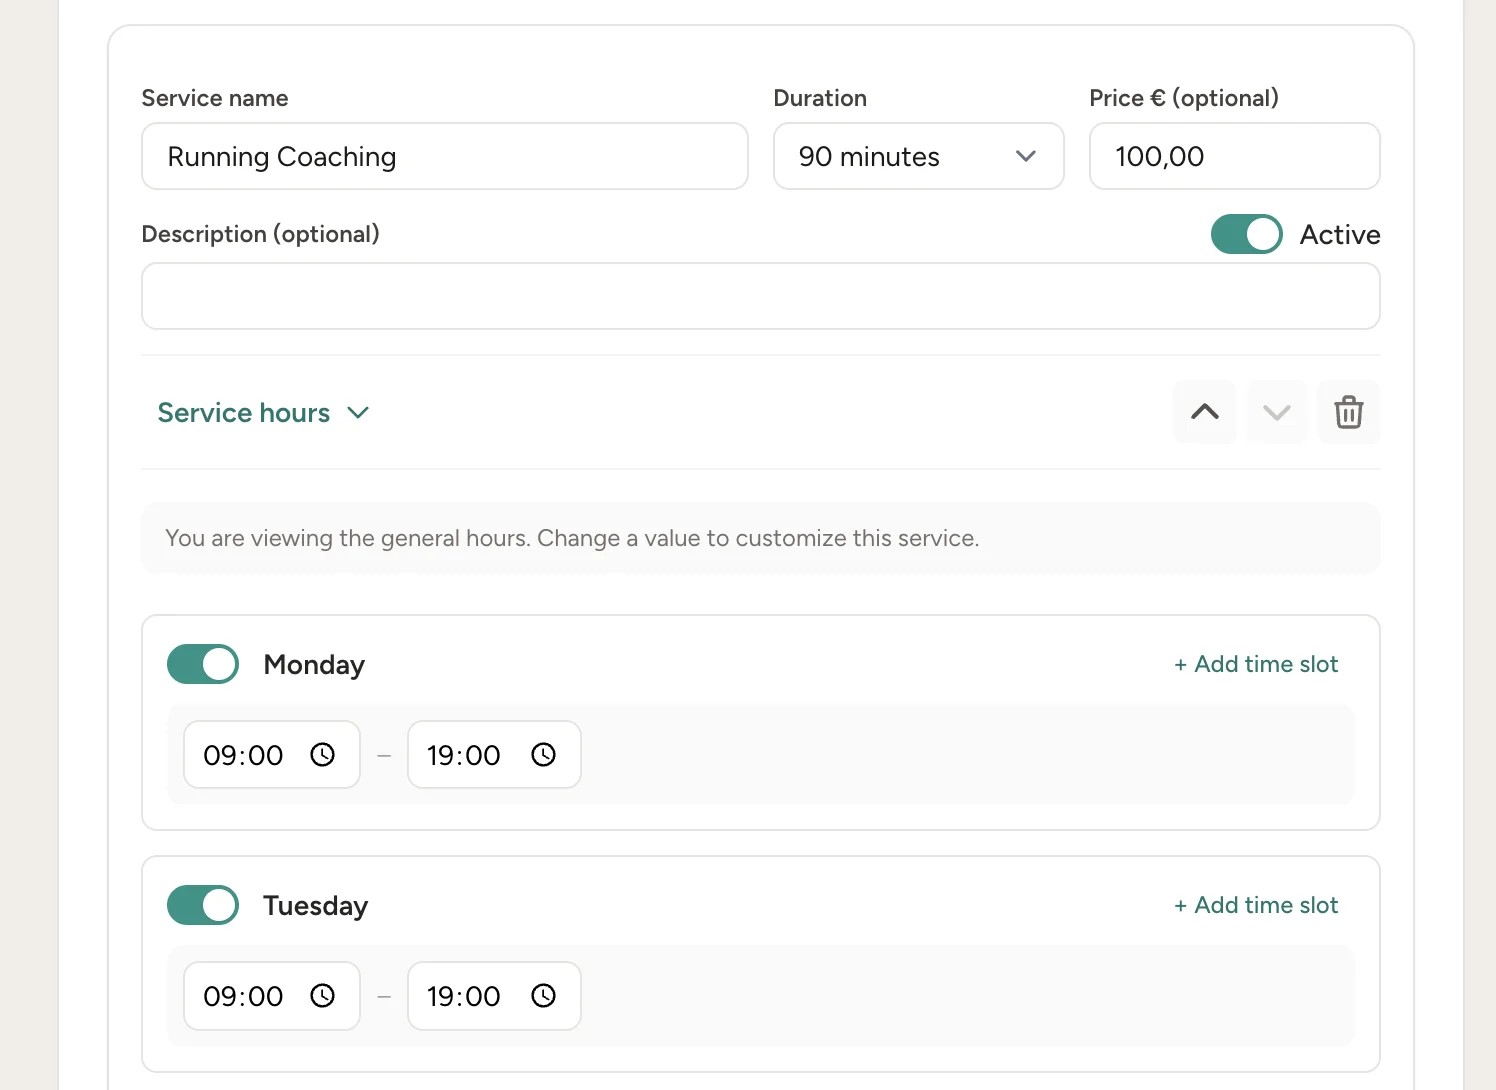
Adjust a service’s own hours
Open a service and its availability settings if it should have different hours from your general schedule. Changing these hours creates service-specific availability. Check the public page after saving.
Step 06
Choose booking rules
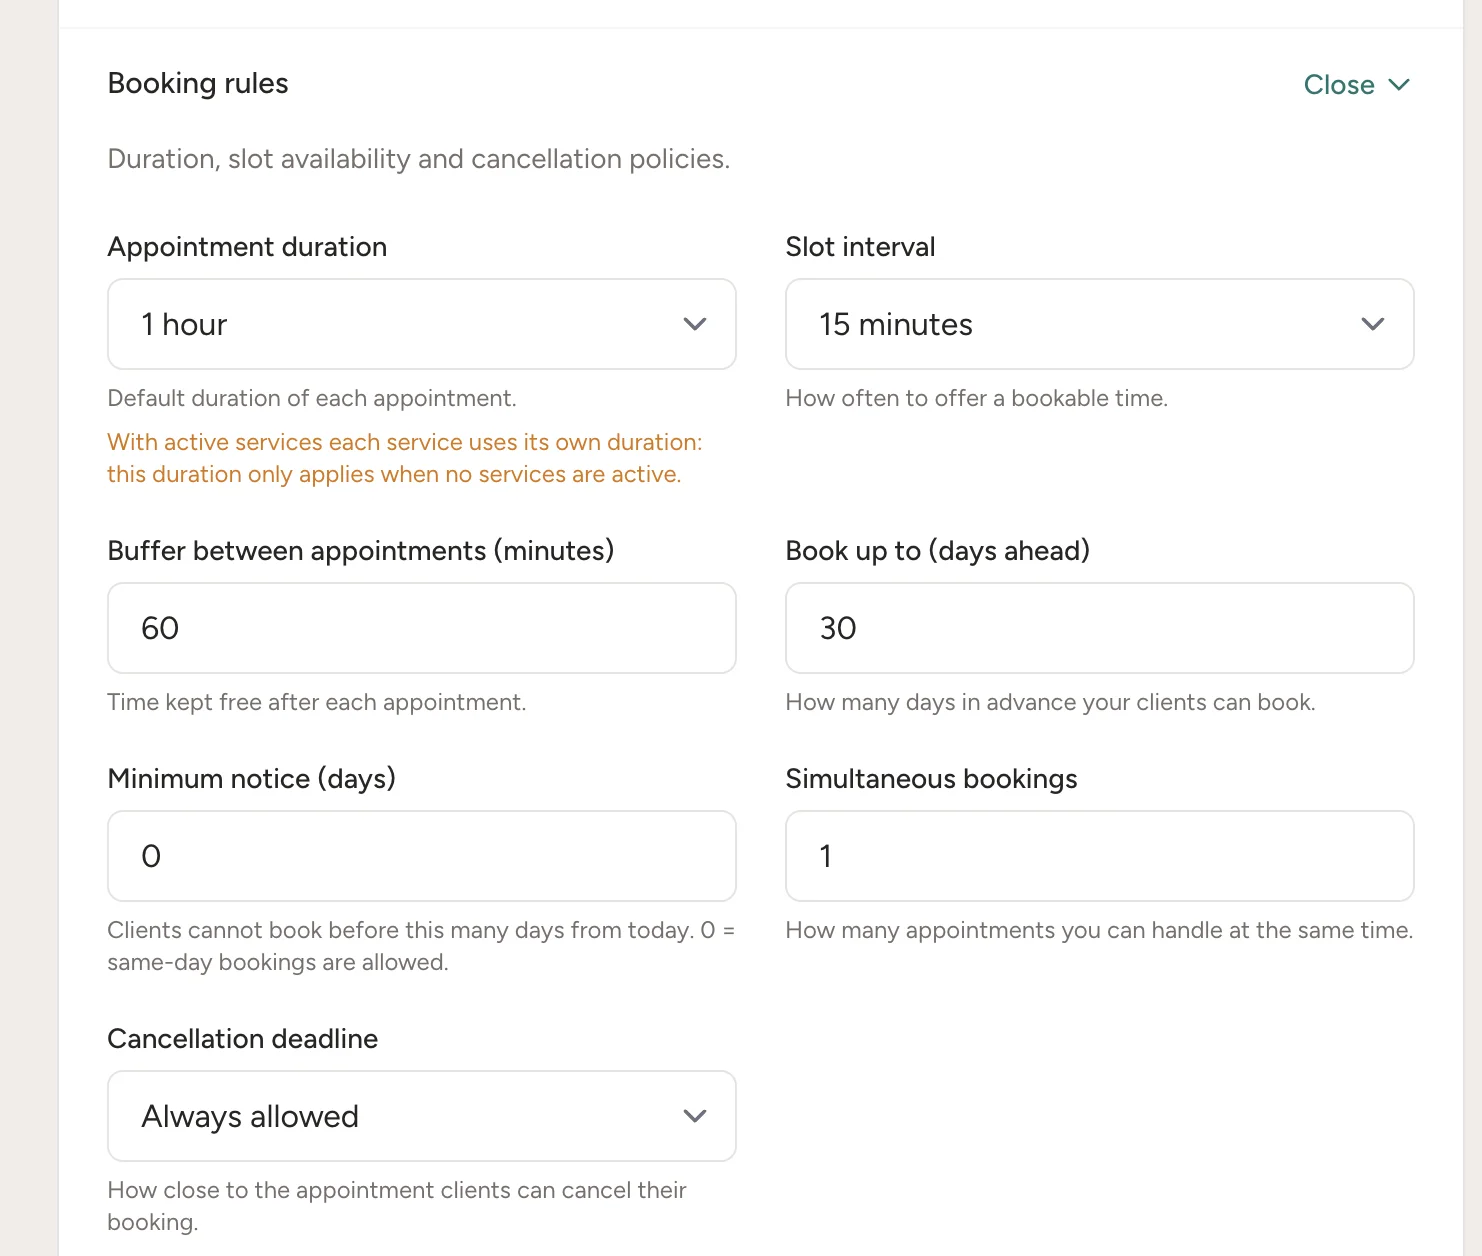
Choose how clients can book and change appointments. Check each rule against the way you manage your day.
- Slot interval: How often a new start time is offered.
- Buffer: Time kept free after an appointment.
- Booking window and minimum notice: How far ahead and how soon clients may book.
- Capacity: How many bookings may share a time slot.
- Approval: Whether bookings are confirmed automatically or need your approval.
- Changes and cancellations: How close to the appointment clients may reschedule or cancel.
Step 07
Ask useful questions
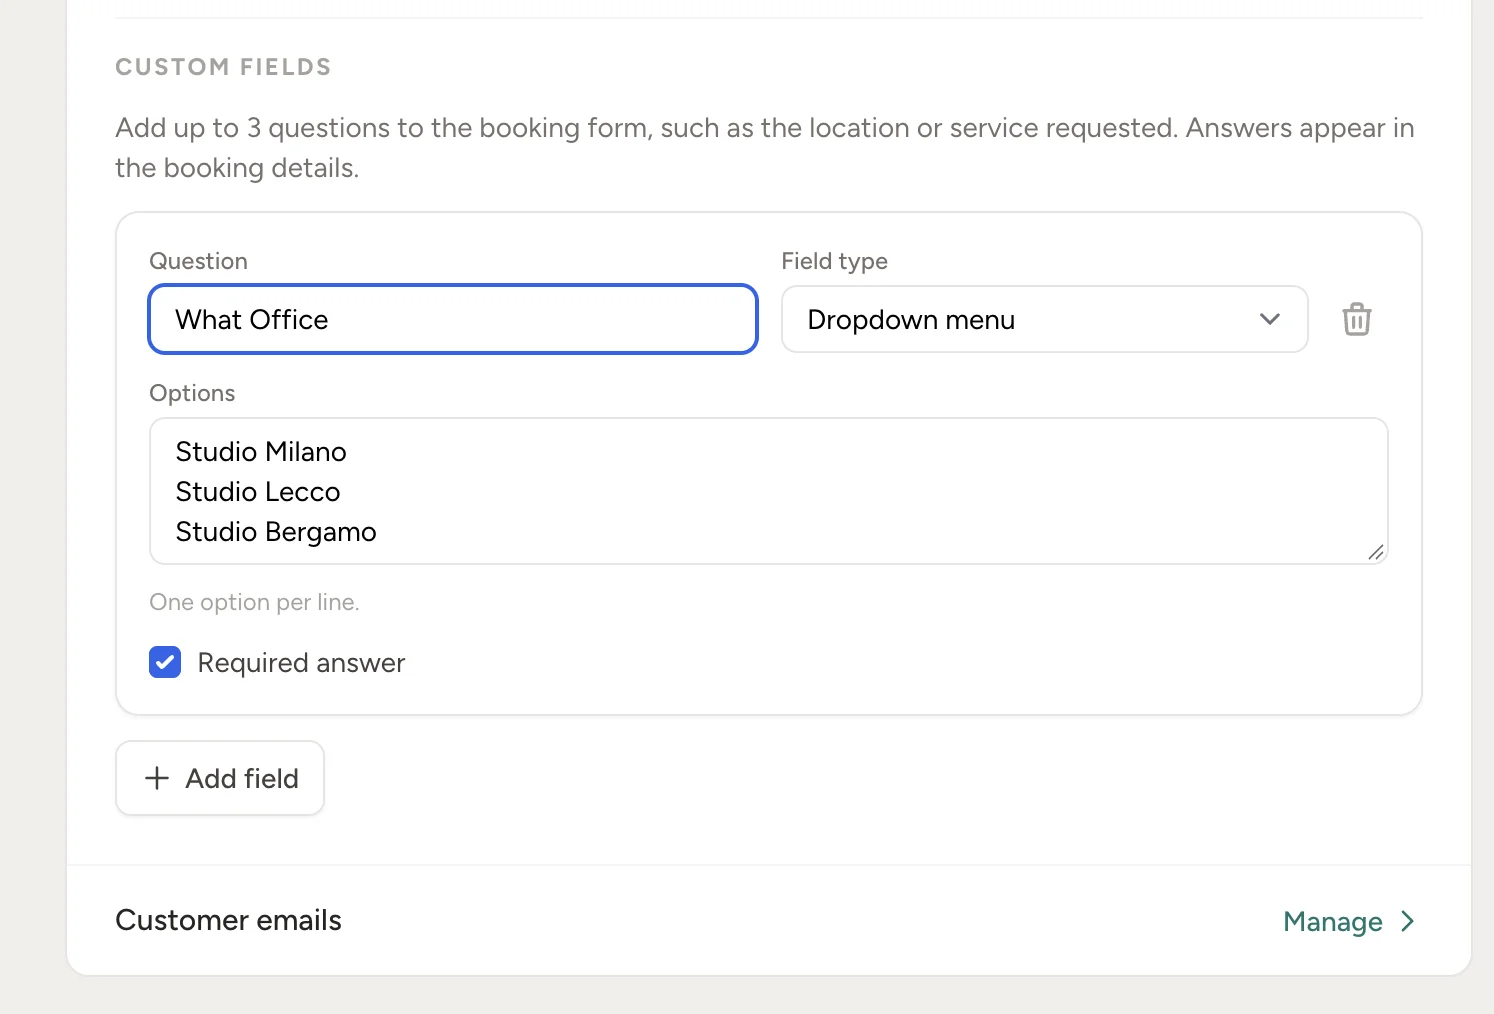
Add up to three custom text or dropdown questions. Make an answer required only when you need it to handle the booking. Answers appear in booking details; avoid collecting unnecessary sensitive information.
Step 08
Set hours for a special period
Add a start and end date for seasonal availability. Enable the working days and time ranges for that period. During that date range, these hours replace your normal weekly schedule; days left disabled remain closed.
Step 09
Check Calendar integration
If you use Google Calendar, choose whether existing events block booking slots and whether new bookings are written to Google. These are separate settings. Check them against the way your team manages appointments.
Step 10
Test before sharing
Save your settings and open the public link in a private browser window. Use your own details for a test booking, then work through this checklist.
- Try a service with normal hours and one with custom hours. Check the available days and times.
- Leave required questions empty and check that the form asks you to complete them.
- Check dates inside and outside a special period.
- Complete a booking and verify the service and answers in its details.
- Check the confirmation or approval flow, and try the cancellation or rescheduling link within your rules.
Your booking page is ready to share
Let clients choose their service and time while you get on with your day.
New to RecordarApp? Start your 14-day free trial. No credit card required.